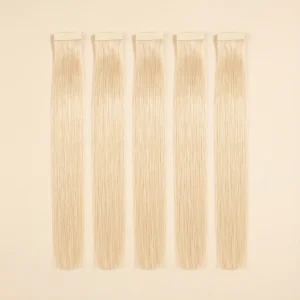
Clip-in hair extensions are temporary weft-based attachments with pressure-sensitive clips that instantly add length and volume without permanent commitment, requiring proper selection of Remy hair, strategic application on dry hair one inch above the nape, and horizontal sectioning for seamless blending.
Clip-in hair extensions for beginners require three critical decisions that determine success or failure. First, selecting Remy hair with aligned cuticles prevents tangling and premature deterioration. Second, choosing seamless polyurethane bands for fine hair or classic lace wefts for thick hair ensures comfortable, undetectable wear. Third, mastering dry, oil-free application, starting one inch above the nape with proper horizontal sectioning, creates professional results at home.
Key Takeaways
- Choose seamless polyurethane bands for fine hair or classic lace wefts for thick hair, based on your natural density.
- Select Remy hair with aligned cuticles and silicone-lined clips to prevent tangling and scalp damage.
- Apply extensions to completely dry, oil-free hair, avoiding conditioner near roots to maintain grip
- Attach the largest wefts first, one inch above the nape, then stack the smaller pieces upward in 1-1.5 inch intervals.
- Blend extensions with natural hair using proper brushing techniques and matched styling for seamless appearance.
Understanding Clip-In Hair Extensions
Clip-in extensions deliver instant transformation without permanent commitment or professional installation. The technology has evolved significantly, offering multiple options for different hair types and styling preferences.
Extension Types by Construction:
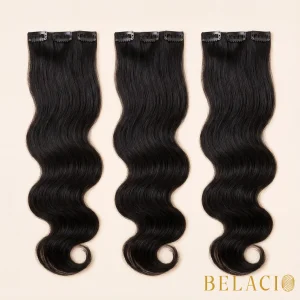
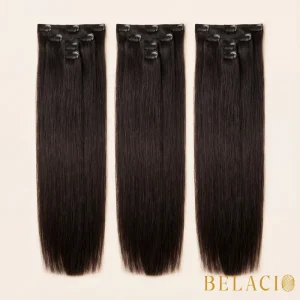
- Classic lace clip-ins provide volume for thick hair through traditional weft construction
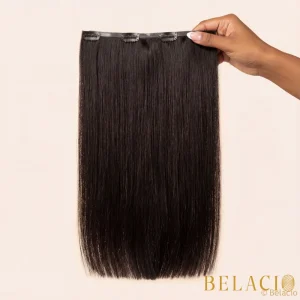
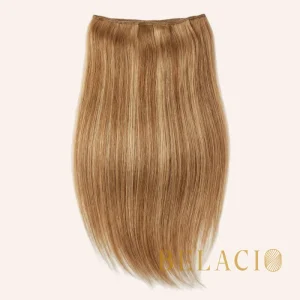
- Seamless polyurethane bands lay flat and undetectable for fine hair types
- Halo wire-based systems offer adhesive-free comfort for thin hair with minimal attachment
Key Features:
- No heat, glue, or professional skills required for application
- Installation completes within 10-15 minutes versus hours for permanent methods
- Secure silicone grips prevent slippage during normal daily wear
- Reusable durability lasting 6-12 months with proper maintenance protocols
- Zero damage to natural hair when applied and removed correctly
Extensions attach near the root using small clips, creating the illusion of thicker, fuller hair immediately. This temporary solution supports varied styling needs without long-term commitment.
What to Look for When Buying First Extensions
First-time buyers often make purchasing decisions based on appearance while overlooking technical specifications. Hair quality and cuticle alignment significantly impact extension performance and longevity over time.
Critical Evaluation Criteria:
- Remy hair with aligned cuticles prevents catastrophic tangling within weeks of use
- Silicone-lined clip mechanisms eliminate scalp damage from cheap metal alternatives
- Natural lighting color selection exposes the synthetic sheen that brands hide in studio photos
- Breathable weft construction ensures comfort without scalp pressure during extended wear
- Seamless skin wefts and injected invisible wefts deliver professional-grade comfort
Purchasing Considerations:
- Established suppliers maintain strict quality control protocols for consistency
- Reputable brands provide sample swatches for accurate matching before purchase
- Fine or thin hair requires lace weft or seamless options for natural blending
- Weight distribution matters – choose lighter wefts for delicate hair types
Extension Selection Guide
| Hair Type | Best Extension Type | Weft Construction | Clip Style |
| Fine/Thin Hair | Seamless polyurethane | Flat, invisible weft | Small silicone-lined clips |
| Medium Hair | Lace weft or seamless | Breathable lace base | Standard silicone clips |
| Thick Hair | Classic lace clip-ins | Traditional weft | Wide grip clips |
| Very Thin Hair | Halo wire system | Wire-based attachment | No clips required |
Preparing Hair for Extension Application
Proper preparation determines whether extensions stay secure all day or slip within hours. Hair must be completely dry and oil-free before any weft touches your scalp.
Pre-Application Checklist:
- Wash hair without applying conditioner near roots to maintain natural grip
- Dry hair completely using a blow dryer on medium heat until no moisture remains
- Detangle thoroughly, starting at the ends and working upward with a wide-tooth comb
- Apply dry shampoo or texturizing powder to roots for essential friction
- Section horizontally from the nape upward using the tail comb for clean divisions
- Lightly tease at clip zones to provide grip without causing damage
Common Preparation Mistakes:
- Applying extensions to damp hair destroys the clip grip instantly
- Using conditioner or oils near the roots creates a slip that makes extensions fall
- Skipping sectioning creates visible gaps and an unnatural bulging appearance
- Neglecting root teasing results in constant slippage throughout the day
Keep a mirror positioned properly to monitor your sectioning accuracy from multiple angles. This ensures precise placement for undetectable results.
How to Apply Clip-In Extensions Step by Step
The application process follows a systematic three-phase approach that delivers professional results. Most beginners fail because they skip critical steps or attach wefts without a strategy.
Prepare Hair and Sections
Strategic preparation eliminates amateur mistakes entirely. Foundation protocol determines whether extensions stay secure or slip within hours of wear.
Foundation Protocol:
- Create hair partings using a rat-tail comb, sectioning horizontally from the nape upward.
- Tease hair at the root attachment zones lightly, building anchor points without damaging the hair.
- Detangle thoroughly with wide-tooth implements before any weft application
- Mist teased sections with texturizing spray for enhanced grip throughout wear
- Test each weft placement before clipping to confirm seamless width alignment
- Open clips fully, roll backward into roots, then snap firmly center-first
Attach Wefts Bottom-Up
Bottom-up attachment methodology eliminates errors through systematic layering. This mirrors natural hair growth patterns for undetectable integration.
Weft Application Sequence:
- Begin one inch above the nape hairline, clipping away the upper sections immediately
- Position the largest four-clip weft approximately 1 cm below the part line for security
- Fasten the center clip first, then secure the sides, working outward for even distribution
- Stack subsequent wefts upward in 1 to 1.5-inch intervals without overlapping rows
- Use three-clip wefts mid-shaft, two-clip pieces at sides angled toward temples
- Apply the smallest wefts at the crown last with gentle backcombing for lift on fine hair
Blend and Style Together
Proper weft placement means nothing without flawless blending. Unity requires deliberate integration of natural hair with extensions as a single cohesive unit.
Integration Technique:
- Brush from ends upward using soft bristles to prevent pulling wefts loose
- Apply heat tools simultaneously to both natural strands and extensions with protectant
- Finish with lightweight serum across blended sections to unify shine levels
- Check from multiple mirror angles for exposed clips requiring adjustment
- Reposition loose wefts immediately to prevent mid-day failures
Blending Techniques for Natural Appearance
Blending separates amateur applications from professional results. Proper brushing and styling techniques eliminate harsh demarcation lines while creating unified movement between natural hair and wefts.
Brush and Blend Properly
Brushing Protocol:
- Use wide-tooth combs exclusively on dry extensions, starting from the ends upward
- Tease natural hair roots at clip positions, spray with volumizing product for grip
- Position the bottom wefts above the pinned sections, adjusting for density to hide the clips
- Brush both natural hair and extensions together after application for integration
- Layer multiple wefts vertically with strategic overlap to eliminate blunt lines
- Never brush wet extensions, as this weakens bonds and causes shedding
Match Texture With Styling
Perfect brushing means nothing if extension texture contradicts natural hair patterns. A synchronized application requires careful attention to detail.
Texture Matching Steps:
- Identify natural texture type precisely – straight, wavy, curly, or coily classification
- Select extensions mirroring exact curl patterns and strand thickness specifications
- Pre-style both natural hair and extensions together using moderate heat tools
- Apply heat protectants to preserve texture integrity throughout thermal styling
- Cut and layer extensions while installed to eliminate blunt transition lines completely
Conceal Clips With Waves
Clip visibility destroys extension credibility instantly. Strategic curl patterns effectively camouflage hardware through deliberate texture manipulation.
Concealment Technique:
- Style natural hair and extensions simultaneously with a curling iron for consistent texture
- Begin with loose waves at roots, gradually increase tightness through mid-lengths
- Always curl after clipping extensions to ensure thermal styling encompasses both equally
- Straight finishes highlight every clip outline, while curls create dimensional coverage
Application Timeline Guide
| Step | Time Required | Critical Action | Common Mistake |
| Hair Preparation | 5-7 minutes | Completely dry and detangle | Applying to damp hair |
| Sectioning | 2-3 minutes | Horizontal parts from nape up | Sloppy uneven divisions |
| Root Teasing | 2-3 minutes | Light teasing at clip zones | Skipping this grip step |
| Weft Application | 5-8 minutes | Bottom-up systematic layering | Random placement without strategy |
| Blending & Styling | 5-10 minutes | Unified brushing and heat styling | Treating extensions separately |
| Total Time | 15-25 minutes | Complete professional application | Rushing through critical steps |
Caring for and Maintaining Extensions
Poor maintenance destroys premium hair faster than inferior quality products. Extensions demand systematic attention for longevity and performance throughout their lifespan.
Essential Maintenance Requirements:
- Wash every 8-15 wears using sulfate-free formulas that preserve natural oils
- Deep condition monthly with moisturizing masks from mid-lengths to ends only
- Store in breathable silk bags within cool, dry environments away from humidity
- Brush gently 2-3 times daily using wide-tooth combs designed for extensions
- Remove extensions before swimming to prevent chlorine damage completely
- Apply argan oil sparingly during dry winter months for moisture balance
- Limit heat styling frequency to preserve cuticle integrity long-term
Seasonal Care Adjustments:
- Summer requires extra protection from chlorine, salt water, and UV exposure
- Winter static demands adapted protocols with anti-static spray and moisture treatments
- Humid climates need anti-frizz products and more frequent brushing sessions
Troubleshooting Common Issues
Even the most rigorous maintenance routines collapse when fundamental installation problems arise. Systematic intervention effectively prevents common wear-and-tear failures.
Slipping and Grip Problems:
- Clips loosen from improper technique – tease roots thoroughly before application
- Replace worn or defective clips immediately when they lose tension
- Ensure hair is completely oil-free and dry before attaching any wefts
- Use texturizing spray at the roots to create the necessary friction for grip
Comfort and Scalp Issues:
- Tight installation creates unbearable pain – distribute pressure across larger areas
- Back-combing beneath clips reduces localized tension on sensitive spots
- Remove and reposition extensions immediately if discomfort persists beyond minutes
- Choose lighter weight wefts if scalp sensitivity continues with proper application
Tangling and Maintenance:
- Product buildup signals need for washing – cleanse every 8-15 wears consistently
- Aggressive brushing causes damage – always start from ends working upward gently
- Detangle only when completely dry using wide-tooth combs with leave-in conditioner
- Regular position checks throughout wear prevent visible wefts and maintain appearance
Frequently Asked Questions
Can I sleep with clip-in hair extensions in overnight?
Sleeping with clip in hair extensions overnight isn’t recommended because prolonged pressure from the clips can lead to tangling, breakage, and scalp discomfort. A healthy routine means removing them before bed to protect your natural hair and maintain extension quality over time.
How long do clip-in hair extensions typically last with regular use?
With proper care, clip in extensions generally last 6 to 12 months with regular wear and even longer with occasional use. High-quality human hair extensions maintain softness and durability when washed gently, stored correctly, and handled carefully between wears.
Can I swim or exercise while wearing clip-in extensions?
Clip-ins should be removed before swimming or intense workouts, as water and sweat weaken grip and damage fibers. While light movement may be manageable, exposing hair clips to moisture increases slippage and shortens the lifespan of the extensions.
Will clip-in extensions damage my natural hair over time?
When you correctly apply clip-in hair extensions, they are one of the safest temporary options available. Issues only arise with improper placement, excessive weight, or overnight wear. Using extensions made from real human hair further reduces friction and stress on natural strands.
How many clip-in wefts do I need for full head coverage?
Achieving full coverage depends on density, length, and hair texture, but most people need 6–8 wefts for natural fullness. During installation, section your hair carefully from the nape upward and follow a step-by-step guide to help the wefts blend seamlessly. Choosing pieces that match your hair in both hair color and thickness ensures a balanced, realistic finish.
Conclusion
Successful clip-in extension use begins with understanding three critical foundations: selecting quality Remy human hair with aligned cuticles, mastering proper application technique on dry oil-free hair, and maintaining extensions through systematic care protocols. The difference between disappointing results and professional transformation lies entirely in following proven methods rather than rushing through application or choosing inferior products. Quality clip-in extensions require 100% Remy human hair, reinforced weft construction, and medical-grade silicone-lined clips that grip without causing breakage or discomfort. Smart buyers demand extensions engineered for 12-month lifespans with proper maintenance rather than settling for synthetic alternatives that deteriorate within weeks. Transform your hair journey today with Belacio Hair’s premium Vietnamese Remy clip-in extensions, explicitly designed for tropical climates and engineered to deliver salon-quality results at home. Discover the confidence that comes from flawless, natural-looking length and volume that withstands daily wear while protecting your natural hair health completely.