Weft hair extension installation involves securing hair bundles sewn or woven together at the top to natural hair using sew-in, beaded, or adhesive attachment methods, requiring proper sectioning, tension control, and professional-grade materials for 6-8 week wear periods.
Weft hair extension installation requires precise preparation, starting with sulfate-free clarifying shampoo on dehydrated, product-free hair to ensure optimal adhesion. Professional installation requires hand-tied or machine wefts secured through proper sectioning, whether using silicone-lined micro rings, medical-grade bonding adhesive, or sewn attachment with controlled tension. Quality extensions feature double-stitched construction, cuticle alignment, and superior grade classifications that withstand heat styling and chemical processing.
Key Takeaways
- Prepare natural hair with sulfate-free clarifying shampoo, avoid conditioner and styling products, and ensure hair is dehydrated and tangle-free
- Select quality extensions by testing heat tolerance, checking cuticle alignment, verifying double-stitched construction, and examining for proper weft sealing.
- Create a secure foundation with cornrow braiding for medium-to-thick hair, or with beaded sectioning for fine hair textures.
- Attach wefts using silicone-lined micro rings or medical-grade bonding glue while maintaining proper tension to prevent natural hair damage.
- Schedule maintenance appointments every 6-8 weeks for repositioning as natural hair grows and to check attachment security
Understanding Weft Types
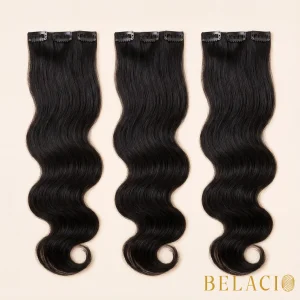
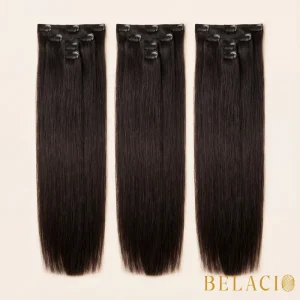
Hand-tied wefts create ultra-thin extensions perfect for fine hair density, while machine wefts deliver maximum volume for medium to thick textures. Hybrid options accommodate all densities requiring enhancement. Natural hair preparation determines installation success and prevents damage that compromises extension longevity.
Clients must wash with a sulfate-free clarifying shampoo the day before their appointment to obliterate oils and buildup. Skip conditioner entirely, as it creates slippery bases affecting extension adhesion. Hair must arrive completely dry, thoroughly brushed, and tangle-free.
Pre-Installation Hair Preparation
- Wash hair with a sulfate-free clarifying shampoo 24 hours before the appointment.
- Avoid all conditioners, oils, and styling products that create slippery surfaces.
- Ensure hair is dehydrated before arrival at the salon
- Brush thoroughly to remove all tangles and knots
- Avoid heat styling on appointment day to prevent product buildup
Essential Tools and Materials
Professional weft installation demands precision equipment rather than improvised alternatives. The essential checklist begins with sectioning fundamentals: rat-tail combs for horizontal parting, fine-toothed combs for partition creation, and wide-tooth varieties for natural hair protection.
| Tool Category | Required Items | Purpose |
| Sectioning Tools | Rat-tail comb, sectioning clips, fine-toothed comb | Create precise partings and organize hair during application |
| Attachment Hardware | Extension pliers, silicone-lined micro rings, loop tools | Secure beaded installations with proper tension |
| Sewing Equipment | Curved weaving needles, high-tensile nylon thread | Attach wefts securely to cornrow foundations |
| Styling Tools | Hair dryer, flat iron, thinning shears | Blend extensions seamlessly with natural hair |
Selecting Quality Extensions
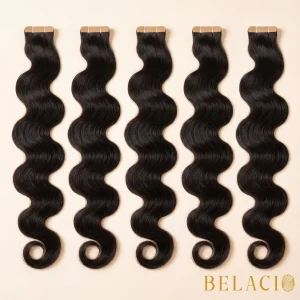
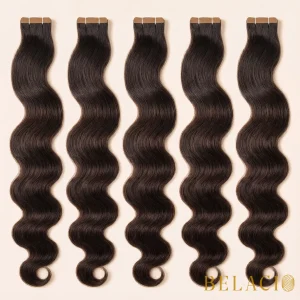
Virgin Remy human hair separates professional installations from amateur disasters. Cuticles must align uniformly to prevent tangling nightmares that destroy client relationships. Higher-grade classifications indicate superior durability and chemical-processing capabilities.
According to dermatological research on hair extensions, proper material selection significantly impacts scalp health and extension longevity. Double-drawn construction maintains consistent thickness from root to tip, while ethically sourced materials provide traceable donor documentation.
Creating the Foundation
Hair texture classification demands methodical evaluation across straight, wavy, curly, and coily patterns. Fine hair contains 100,000-120,000 strands, while thick hair exceeds 150,000 strands. This data determines extension weight capacity and the appropriate installation method.
Cornrow Braiding for Sew-Ins
Precision sectioning with a rat-tail comb creates organized patterns that last 6-8 weeks. Clean, lightly dampened hair reduces breakage during the braiding process. The feed-in technique gradually incorporates extensions for seamless integration with natural hair staying on top while extension pieces blend underneath.
Tension management determines installation longevity. Firm grip without excessive tightness prevents scalp damage while maintaining the flat-to-scalp appearance necessary for secure weft attachment. Consistent braid width requires obsessive monitoring of part-to-braid ratios throughout the foundation creation process.
Beaded Sectioning Technique
U-shaped sectioning follows natural hair growth patterns toward the scalp, distributing weight evenly across the foundation. Each 1/4-inch U-shaped scoop eliminates all tension, preventing the breakage associated with traditional square-sectioning.
Beaded Sectioning Steps:
- Hold the rat tail comb vertically against the scalp for the proper angle
- Create sections that touch the head before forming curves
- Verify U-shape formation before bead placement to ensure proper distribution
- Maintain a consistent 1/4 inch width throughout all sections
- Use silicone-lined micro rings to prevent slippage on all hair textures
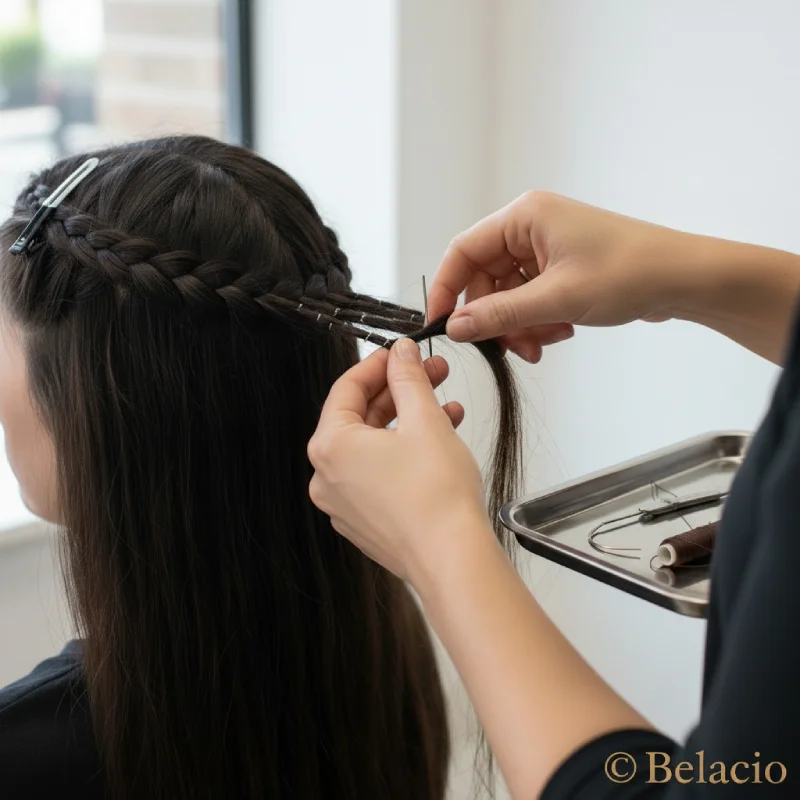
Sew-In Installation Method
The LA Weave technique eliminates braiding entirely, using micro-ring anchors before precise blanket stitching begins. Three whip stitches through actual weft material create unbreakable foundation points that withstand 6-8 week wear periods without slippage or scalp stress.
Professional execution demands a specific sequence: right-side sewing starts at bead placement, needle pierces the weft back through the hair pocket, and triple-wrapped slip knots secure corners. This systematic approach delivers superior results while preserving follicle integrity through strategic anchor positioning and measured weft placement.
Sewing Technique Steps
- Thread a curved weaving needle with color-matched nylon thread
- Begin at one end of the cornrow foundation near the ear
- Pierce the needle through the weft backing and the cornrow simultaneously
- Create whip stitches every 1/2 inch along the weft length
- Secure end with triple-wrapped slip knot for durability
- Repeat the process for each horizontal section, moving upward
- Leave 2-3 inches from the hairline to conceal the installation
Hand-Tied Weft Installation
Hand-tied weft installation represents permanent extension application without scalp trauma when executed correctly. Strategic positioning requires 2-3 finger-widths from the hairline perimeter, while bead sections cannot exceed 1-1.5 times bead width to prevent breakage.
| Installation Step | Technique | Critical Detail |
| Section Creation | U-shaped teardrop formation | Follow natural growth patterns, maintain 1/4 inch width |
| Bead Placement | Silicone-lined micro rings | Position 2-3 finger-widths from hairline |
| Thread Attachment | Double knot technique | Thread length must span 3-5 times section length |
| Weft Securing | Stitch through base hair and weft | Secure on both bead sides before proceeding |
Layering at varying heights creates dimensional depth impossible with machine wefts. Thinning shears and point cutting eliminate the bulky, artificial appearance, while professional finishing requires string wound three times around needles for uncompromising durability.
Blending and Styling
Strategic placement transforms artificial wefts into undetectable additions. Foundation layers use three-clip wefts below eyebrow level to establish structural integrity, while mid-head sections employ shorter pieces for natural dimension. Crown placement requires smallest wefts for undetectable transitions.
Heat styling between 300-350°F creates uniform texture without damage. Research from the Journal of Colloid and Interface Science confirms proper heat application preserves hair protein structure. Curl natural hair and extensions simultaneously, never separately, for seamless integration.
Blending Techniques
- Cut extensions in soft layers matching natural hair length
- Add interior texture that mimics biological growth patterns
- Braid short natural hairs at the base for effective merging
- Use point cutting to remove bulk at attachment areas
- Style natural hair and extensions together with same heat tools
- Focus on nape and temple areas for natural appearance
Maintenance and Care
Schedule appointments every 6-8 weeks for repositioning as natural hair grows approximately 0.5 inches monthly. Professionals must check attachment points for firmness and trim split ends during these sessions to maintain extension integrity and prevent damage.
Daily Care Protocol
- Wash 1-2 times weekly with sulfate-free shampoo and conditioner
- Brush with wide-tooth combs from ends upward to prevent tension
- Apply heat styling maximum 350°F with protectant products
- Avoid attachment points when applying conditioner or treatments
- Use cold water rinses to seal cuticles and prevent damage
- Sleep with hair in loose braids or silk bonnets to prevent tangling
Frequently Asked Questions
How long do different types of weft extensions typically last?
Weft extensions typically last 6 to 8 weeks before needing to be reinstalled as natural hair grows. The hair itself maintains quality for six to twelve months with proper maintenance. High-quality human hair wefts can endure up to three years when properly cared for and reinstalled regularly.
Can I color or chemically treat weft extensions after installation?
Coloring installed weft extensions is possible only with 100% Remy human hair using semi or demi-permanent dyes. Chemical treatments should avoid attachment points and require extensive post-care. Professional application is recommended for optimal results and to prevent damage to both extensions and natural hair.
Will weft extensions damage my natural hair if installed correctly?
When installed correctly by trained professionals, weft extensions cause no damage to natural hair. Proper tension, appropriate weight distribution, and correct placement techniques preserve hair health. However, improper installation or inadequate maintenance can lead to breakage and potential hair loss through traction alopecia.
Can I swim or exercise while wearing weft hair extensions?
Weft extensions allow swimming and exercise due to their secure thread-based or beaded attachment methods. Pre-saturate hair before swimming, use protective styles during activities, and immediately rinse afterward to prevent chlorine or salt damage. Apply leave-in conditioner before water exposure for additional protection.
What’s the difference between hand-tied and machine wefts?
Hand-tied wefts are thinner, lighter, and more flexible, making them ideal for fine hair and creating seamless installations. Machine wefts are thicker and more durable, providing maximum volume for medium to thick hair textures. Hand-tied wefts require professional installation, while machine wefts accommodate various attachment methods, including sewing and beading.
Conclusion
Professional weft installation requires precision cornrowing, proper tension distribution, and strategic placement techniques that separate industry leaders from amateur applications. Quality installation using proper sectioning methods, appropriate materials, and systematic attachment techniques ensures 6-8 week wear periods without damage. Belacio Hair provides premium Vietnamese weft extensions engineered for tropical climates across Puerto Rico, the Caribbean, and Colombian markets, combined with professional installation education that guarantees superior results and client satisfaction.